|
WinSCP Configuration for Two Hops
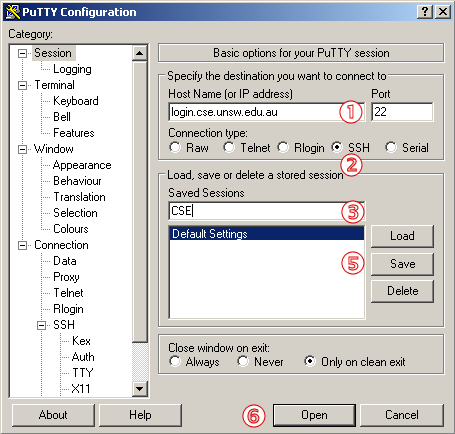
<Copied/Modified from : http://mikelococo.com/2008/01/multihop-ssh/> Using PuTTY and XMING What is PuTTY ? PuTTY is a Windows SSH client that allows you to connect to the CSE servers, giving you a terminal window like you use in the CSE laboratories. PuTTY can be found on via Google. What is Xming ? Xming is a standalone open source X Server for Windows. Programs that use a graphical user interface like Kate require an X server on your home computer. Xming can be found via Google. Installing PuTTY and XMing Run the setup programs for PuTTY and Xming. We suggest that you choose the default options for the installation, and choose the options to create icons for PuTTY and Xming on the desktop. Xming must be running before you run PuTTY. When it is running, you will see an X icon in the system tray (the bottom right hand side of your Windows screen). If you forget, you can always run it after running PuTTY, even if you are logged on to the CSE login server. Configuring PuTTY and XMing When you run PuTTY for the first time, you will see a window like the one below
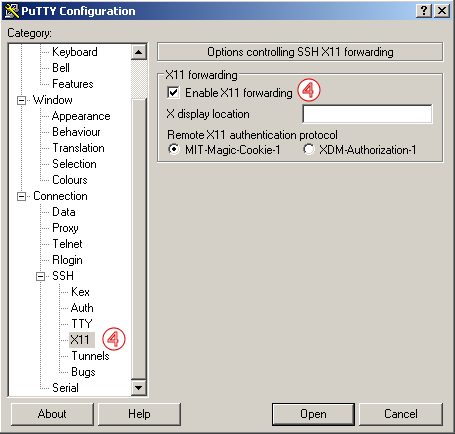
STEP 1 - In the box below Host Name (or IP Address) enter 'hostname.cs.ucr.edu'. STEP 2 - Make sure SSH is selected. STEP 3 - Enter 'hostname.cs.ucr.edu' in the box below Saved Sessions. STEP 4 - Click the [-] to expand SSH from the window on the left (if necessary) and click X11. You should see this screen. Ensure that the checkbox for Enable X11 forwarding is selected.
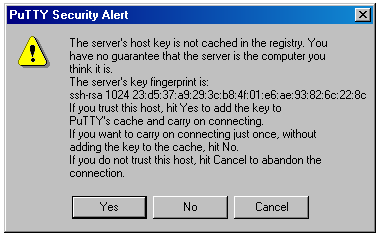
STEP 5 - Click the Save button. The host name you entered should now appear below Default Settings. In the future, you will be able to connect by simply double-clicking this host name. STEP 6 - Click the Open button. STEP 7 - If you see a window like this: click the Yes button.
STEP 8 When you see: login as: enter your CSE username. STEP 9 When you see: username@hostname.cs.ucr.edu's password: enter your CSE password. YOU ARE NOW REMOTELY LOGGED IN TO YOUR CSE ACCOUNT <Copied/Modified from : http://www.cse.unsw.edu.au/~helpdesk/documentation/Putty.html> For NXclient and other account FAQ please see General CS help: http://www.cs.ucr.edu/faq/ |
||||
| Copyright © 2010-Present. All rights reserved. | ||||